How to complete Operation Critical Extraction in MW4 DMZ
Published on · Updated on
MW4 DMZ guide: complete Operation Critical Extraction — breach the Mirae General Hospital in Hajin, sedate the HVT and exfil by chopper with rewards.
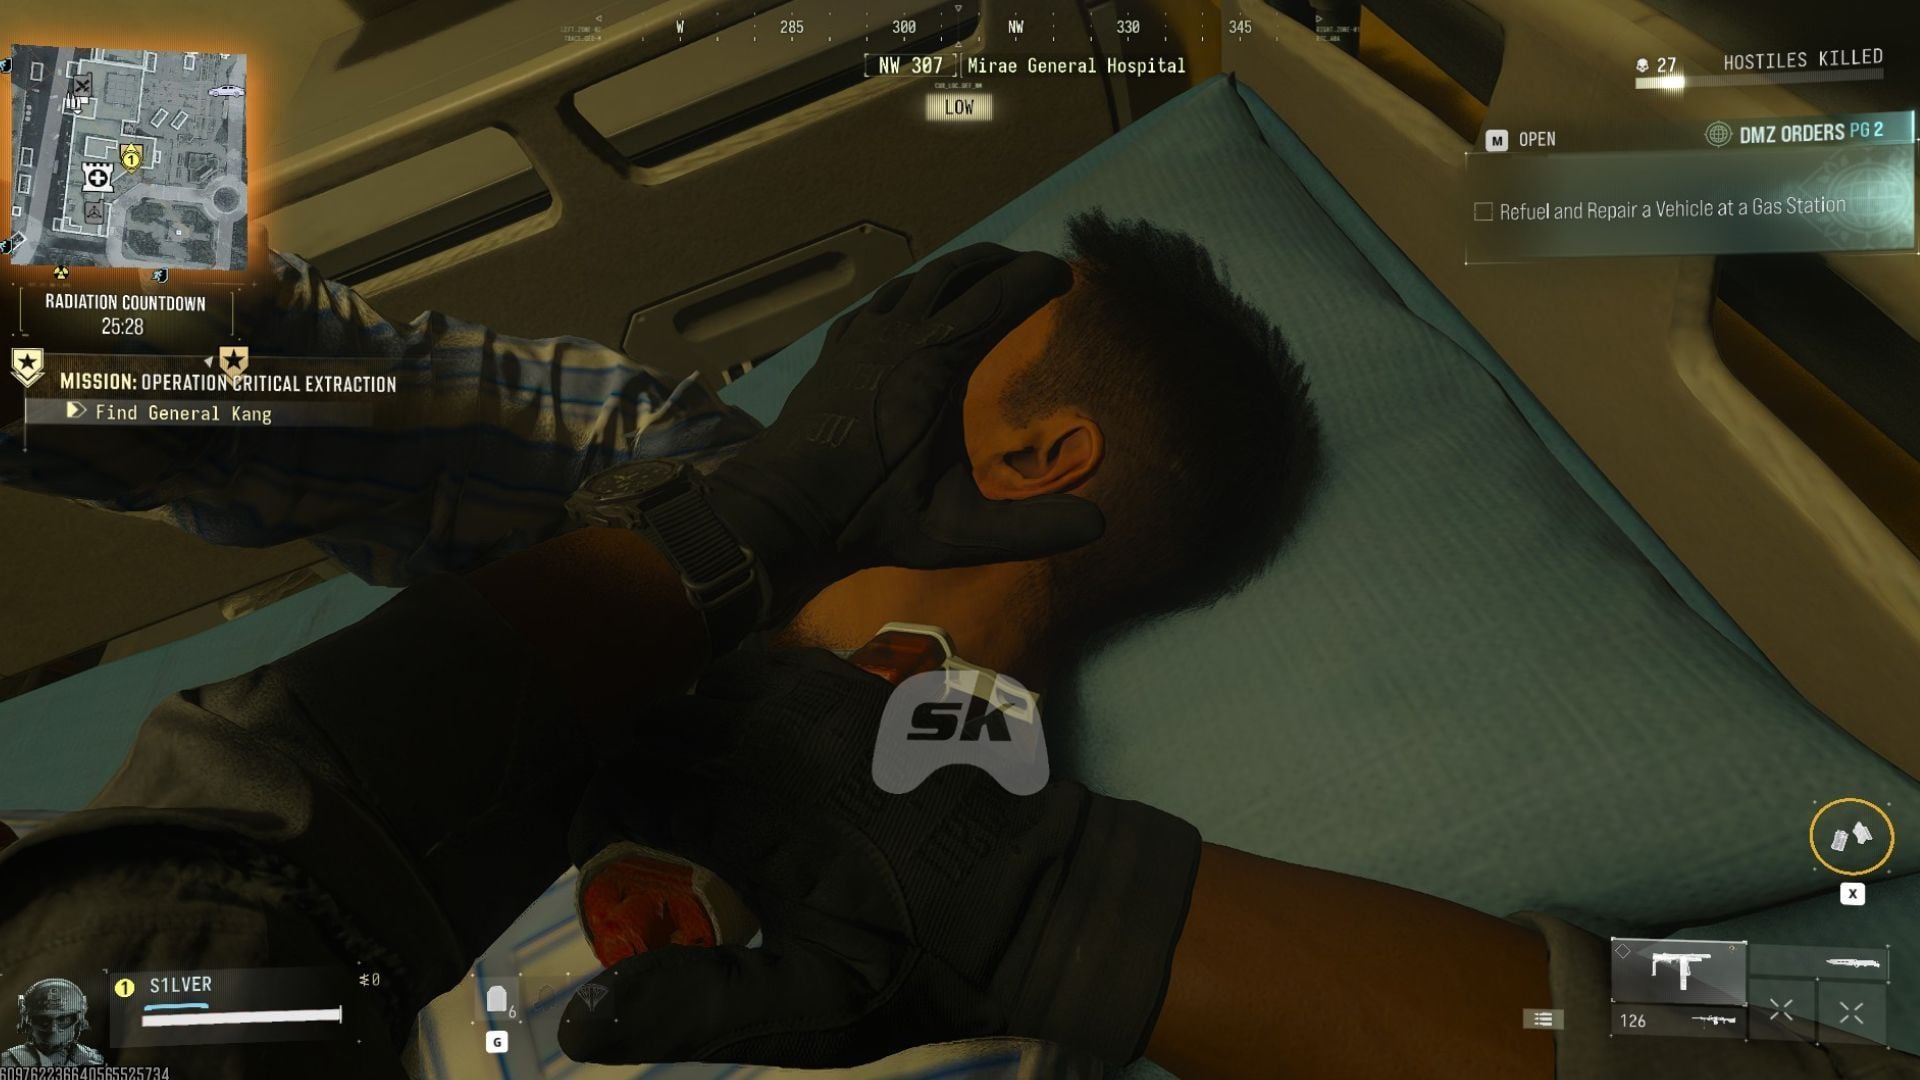
This walkthrough shows how to complete Operation Critical Extraction, one of the first Story Missions in Call of Duty: Modern Warfare 4's DMZ mode. The mission sends an operator to the Mirae General Hospital, in Hajin, to locate a high-value target (HVT) in critical condition, sedate him and fly him out of the hospital rooftop by chopper. The guide gained urgency after DMZ opened in early access on October 20, 2026, for owners of the digital pre-order, three days before the official launch on October 23 for PS5, Xbox Series X/S, PC and Switch 2. Completing the op pays out cash, a medical item requested by other missions and a key that opens new routes across the exclusion zone.
What is Operation Critical Extraction in MW4's DMZ
DMZ returns in Modern Warfare 4 as a full-blown extraction shooter, a genre in high demand right now. It brings twenty squads of up to three players, its own progression track from level 1 to level 70 and the FOB, the Forward Operating Base where players prepare loadouts, craft items and talk to vendors before each deployment. The setting is Hajin, a fictional South Korean exclusion zone where the mode takes place after the campaign's events, with operators recovering weapons and technologies abandoned after a nuclear reactor meltdown. Among the mode's three pillars, Dynamic Operations were built exactly for players who like grinding contracts, a behavior Infinity Ward observed during the mode's original 2022 beta.
For Operation Critical Extraction specifically, the story sends the operator to rescue an HVT who lies in critical condition at the Mirae General Hospital, one of the map's points of interest (POI). The building is overrun by hostile militiamen, which turns every corridor into a fight decided by positioning, cover discipline and smart use of the side rooms as alternate routes.
"Dynamic ops came out of the idea of we saw a lot of people that just wanted to do contracts all day long, and so we built a system around that to make it as dynamic and replayable as we can."
Recommended gear for the mission
Before deploying, the game recommends a 2-Plate Armor Vest and a Medkit. In practice, players who have already completed the mission solo report that it is doable even with a Free Loadout, the basic free kit for anyone entering without stored items. The golden rule is simple: the better your gear, the calmer the mission, but nothing here demands special keys or progression milestones to start.
- 2-Plate Armor Vest — the corridor run will deal damage before you find good cover, so armoring up early avoids risky sprints.
- Medkit — heals between rooms after you clear angles from positioned shooters, keeping the pace without aborting the extraction.
- Ammo and mid-range weapons — most engagements happen in corridors, elevators and the helipad, closed spaces with little open field.
- Discipline and patience — the cafeteria ambush is the mission's peak, and improvising there is a recipe for losing time and resources.
Step 1: locate the HVT and breach the Mirae General Hospital
When you spawn into Hajin at the start of the match, the first objective is reaching the Mirae General Hospital, well marked in the exclusion zone. The building, however, is heavily guarded: sentries on the balconies and, worse, an LMG covering the main entrance. The smartest play is to take the Emergency entrance, marked on your map, and slip quietly into the ER lobby.
Inside, clear the enemies by the reception desk and take the stairs to the floor where the HVT is marked on the map. From then on, the mission becomes a cat-and-mouse game through corridors: each stretch has an LMG covering the central gap, and advancing in a straight line almost always costs you.
The recommended tactic is to move room by room, crossing the building through the side bedrooms and offices. Those spaces protect you from crossfire, let you armor up calmly and even create flanking angles. Use the fact that the LMGs' glass shields have slits: you can hit the soldier through the small gap between the glass plates. Repeat this corridor by corridor until the path is clear.
Step 2: sedate the HVT and push the trolley through the building
When you reach the target, the available interaction is to sedate the HVT — no discussions, no extra story beat: press the prompted button and the mission automatically moves to the transport phase. Since the target cannot walk, you must push the patient trolley to the elevator, and this is where the mission truly turns hostile.
The trick lies in the AI mechanics: enemies do not shoot the patient, so crouching behind the trolley grants solid protection. Use that detail to methodically clear the corridors to the first elevator, call it and step in. On the next floor, another group waits: take them out and push the trolley through the lobby to the next elevator.
How to survive the cafeteria ambush
The second elevator takes about a minute to arrive, and that is when the mission designs its worst moment: you are stuck in a wide-open cafeteria while an ambush closes in. The only reliable cover is the cashier's counter — hug it, eliminate the enemies that appear and only move when the elevator opens.
When the doors open, rush in and press the button immediately. Losing time in the room means more enemies arriving, and the spot by the counter uses the smallest cover perimeter to your advantage.
Step 3: extract through the hospital helipad
The elevator opens onto the Mirae General Hospital rooftop. Take the door on your right, but stay sharp: enemies spawn behind you as you leave the cabin. Clear the gap, cross the door and reach the helipad, where more enemies guard the waiting chopper.
Use the trolley as mobile cover during the final fight and take out the remaining defenders. Then push the HVT all the way to the chopper, board with him and the mission is complete with the extraction performed — the classic exfil that closes the loop of the mode and banks the rewards.
Mission rewards
Completing Operation Critical Extraction pays three rewards that plug straight into DMZ progression:
| Reward | What it does |
|---|---|
| Mirae Electrical Room Key | Key to a restricted room inside the same POI, opening better loot and future objectives at the hospital. |
| Defibrillator | Medical item requested by specific objectives in other missions of the mode. |
| 25,000 DMZ Cash | Currency to spend at the FOB Gunsmith on attachments and base upgrades. |
The Mirae electrical key is the long-term prize: with it in hand, future runs at the hospital become more rewarding, and the return loop to the POI gains purpose within the map's objective rotation.
Context: MW4's DMZ takes the stage
The mode's return rides a wave of demand for extraction shooters, and Infinity Ward treated the system like a protagonist: progression isolated from traditional multiplayer, an expandable FOB with over a dozen stations (Firing Range, Survival Kits, 3D Printer, Gunsmith, Bounty Leaderboard and more), commanders and lieutenants that drop coveted Dog Tags and diversified exfil routes, including Fulton balloons and flares beyond the classic chopper. Those following the launch should check how Black Ops 7's release timing fuels fan theories and the nods Black Ops 7 gives hardcore players.
Official trailer: Call of Duty: Modern Warfare 4 - Official DMZ First Look Trailer on YouTube
Final take: an onboarding mission with room to climb
Operation Critical Extraction does a solid job of introducing the new DMZ's story loop: it demands map reading and careful positioning even for players with modest gear, and it hands out key-based rewards that unlock future content. For beginners, the community consensus is gold — come in through the Emergency entrance, advance room by room, hide behind the trolley and face the cafeteria with patience. With the mode in early access since October 20 and the full launch set for October 23, expect Hajin to heat up fast, and missions like this one will define the rules of engagement for the coming weeks.
This reporting is based on the testing walkthrough by Sportskeeda and official game materials at the official Modern Warfare 4 DMZ page, maintained by Activision. Keep following the ecosystem in the Games section.
Suggested and related articles

MW4 campaign early access opens with all 16 missions

Will the Black Ops 7 Release Date Change? Black Ops 6 Clue Fuels Fan Theory
Call of Duty: Black Ops 7 Has Ironic Achievement for Players Who Play Too Much

FischFright 3 guide: all relics and skulls, with prices

+1 Dino Evolution: Active Roblox Codes for Free Wins and Fast Evolution Tips